Every vacancy starts a clock. Once a tenant moves out, the race begins to inspect, repair, and re-list before rent is lost. Managing apartment turnover efficiently means turning chaos into sequence, coordinating vendors, documenting work, and tracking every task until the unit is photo-ready.
What “Apartment Turnover” Means for Rental Managers
Every property team may define turnover in its own way, but the core steps stay consistent: clean, repair, document, and re-lease, all within the shortest possible timeframe. The sections below outline what an apartment turnover involves and why it directly affects profitability.
Definition and Preparation
The turnover process is the full make-ready cycle between tenants. It covers cleaning, repairs, replacements, and inspections that restore a unit to rentable condition. Each day it sits empty costs income, so managers focus on compressing that timeline without cutting corners.
Good turnover management depends on preparation. A pre-move-out inspection identifies damages, warranty items, and safety issues while the tenant is still in place. Managers confirm access keys, note appliance serial numbers, and photograph high-wear areas. That documentation supports security-deposit decisions and forms the starting scope for maintenance.
Retention and Financial Impact
While strong communication and renewals can reduce turnover frequency, every property eventually faces a vacancy. The key is executing the process efficiently once it starts.
According to the National Apartment Association, the average apartment turnover can cost between $1,000 and $5,000 per unit, depending on location and scope of work. Even short delays compound those expenses. Treating the process as a scheduled operation, not a reactive repair sprint, helps preserve both time and margins.
A 0–7 Day Apartment Turnover Timeline That Cuts Vacancy
To keep vacancy days low, managers treat the make-ready process like a construction schedule. The outline below shows how a well-sequenced turnover unfolds from pre-walk to listing day.
Day 1 – Day 7: Pre-Walk, Scope, and Vendor Booking
Seven days before move-out, schedule a pre-walk with maintenance. List known repairs, paint coverage, flooring needs, and any capital items such as countertop or appliance swaps. Lock in vendor dates now; painters, cleaners, and flooring crews should be confirmed before keys return. Arrange debris removal if larger waste is expected.
Day 1–3 – Repairs, Paint, and Flooring
When the keys hit your desk, heavy work starts fast. Carpenters patch drywall and maintenance replaces fixtures, then painters follow. Flooring crews come next to prevent dust on new finishes. Track units on a shared board or sheet for real-time visibility. This schedule keeps trades from overlapping and protects finished surfaces.
Day 4–5 – Turnover Apartment Cleaning and Safety Verifications
Once the last trade packs up, the cleaners roll in. Kitchens are scrubbed, bathrooms sanitized, and dust lifted from fans and trim. Replace HVAC filters, check smoke and CO alarms, and test outlets with a plug-in tester. Run all plumbing for 60 seconds to verify pressure and drainage before photographing the unit.
Day 6–7 – QA Punch, Photos, and Listing Readiness
On Day 6, walk the unit with your apartment turnover checklist. Note cosmetic items like paint touch-ups or blinds. By Day 7, lighting should be consistent and photos uploaded to the property’s listing platform. Every task needs initials, proof the job’s done, not just started. That checklist becomes record evidence for ownership.
Debris, Recycling, and Documentation During Unit Turnover
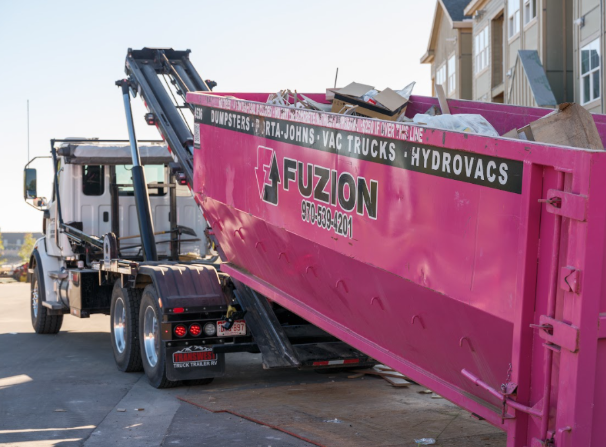
With repairs complete, attention shifts outside the unit, to the dumpster and the debris it collects. Always verify local placement permits and disposal regulations before scheduling hauls, especially near occupied buildings or shared parking areas.
Old carpet, appliances, and packaging can fill a small container quickly. For multi-unit properties, coordinate haul intervals so roll-offs are swapped mid-week instead of overflowing.
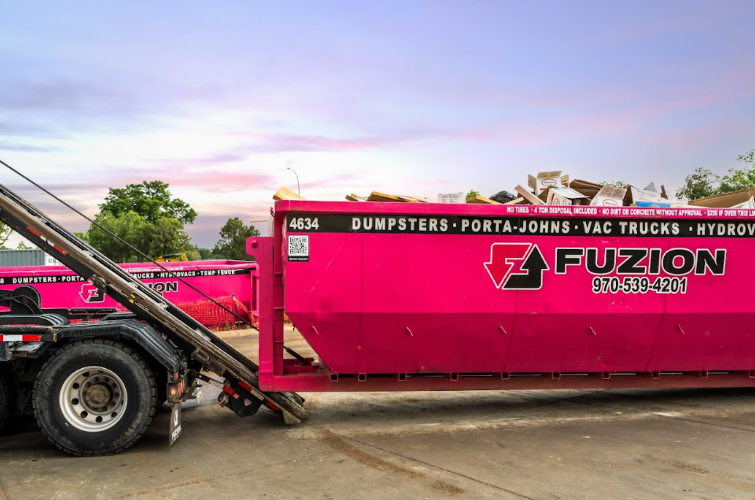
Right-Sizing Containers and Haul Intervals
Selecting the right container and service rhythm keeps waste handling efficient and compliant:
- 10-yard roll-offs suit paint, carpet, and light debris.
- 20-yard roll-offs handle cabinets, doors, and appliances.
- Protect pavement with wood pads and confirm clearance for delivery trucks.
- Schedule hauls every 48–72 hours during heavy turns to avoid overflow and maintain accurate weight tickets.
Short, consistent haul intervals prevent citations, streamline documentation, and keep the property clear for ongoing maintenance and leasing activity.
Contamination Controls and Material Segregation
Treat dumpsters like job-site work zones. Keep latex paint cans sealed, separate electronics, and bag fiberglass insulation. Snap a photo before each pickup, every load logged, every bin accounted for. That proof protects managers from contamination surcharges and helps verify recycling percentages for ownership sustainability reports.
Placement, Protection, and Permit Considerations
Place containers near loading areas but outside daily resident paths. If curb space is required, check municipal dumpster placement permits. Fuzion crews provide site photos, delivery verification, and protective mats to prevent pavement damage, details that reduce post-turn repair costs.
The Apartment Turnover Checklist Rental Managers Actually Use
Use this apartment turnover checklist to verify that every system, surface, and fixture is ready for the next tenant before photos or showings begin.
Locks, Alarms, and Life Safety
- Replace every lock cylinder and issue new key sets.
- Test smoke detectors, CO monitors, and GFI outlets.
- Label water shutoffs and breaker locations inside cabinets for quick reference.
Plumbing, Appliances, and Moisture Checks
- Check under sinks for leaks, tighten P-traps, and clean aerators.
- Run each appliance cycle, dishwasher, washer, and range, to verify heating and drainage.
- Look for moisture staining around tubs and baseboards; early discovery prevents mold claims later.
Surfaces, Touch-Points, and Odor Neutralization
- Wipe doorframes, switch plates, and vents.
- Deodorize with neutral products rather than fragrances.
- Seal minor drywall repairs with primer so color coats stay even.
- Finish by opening windows for an hour to exchange indoor air before photographing.
This tenant turnover checklist can live in digital form for quick uploads to property-management software. Each task becomes a timestamped record during audits or deposit disputes.
Budget, COIs, and Photo-Log Documentation
Good documentation closes the loop on every job. Budgets, COIs, and photos show the work, the cost, and the completion date in one place.
Chargebacks vs. Capital Repairs
Document which repairs fall under tenant damage versus ownership capital. Chargebacks require clear before-and-after photos plus dated invoices. Capital repairs, new flooring or cabinets, should list asset codes and vendor COIs in the same file folder. Keeping separation early avoids accounting confusion later.
Before/After Photo Standards and File Naming
Start wide, then zoom in on details; inspectors see stories, not snapshots. Use consistent lighting, orientation, and timestamps. Label files as “Unit-### 2025-Turn-Kitchen-After.jpg” for uniformity. When inspectors or owners review the set, they can confirm progress without visiting the site.
Strong documentation defines professional apartment management. It demonstrates compliance, supports insurance, and reinforces trust between ownership and management teams.
Schedule Fuzion Dumpster Services for On-Time Apartment Turnovers
Fuzion coordinates debris removal around tight turnover timelines. Containers are sized for each scope of work, swapped on schedule, and documented for compliance with local placement and recycling rules. Contact us today for more information.